Many people think postcards are a thing of the past – but we disagree! What better way to tell a loved one that you are thinking of them than to send them a personalized letter on the back of a beautiful card?
Unfortunately, because so many people are focused on emails, text messages, and cell phone greetings, the art of the Postcard has been left in the past. Luckily, we’re here to help.
How to Write and Address a Postcard in Canada
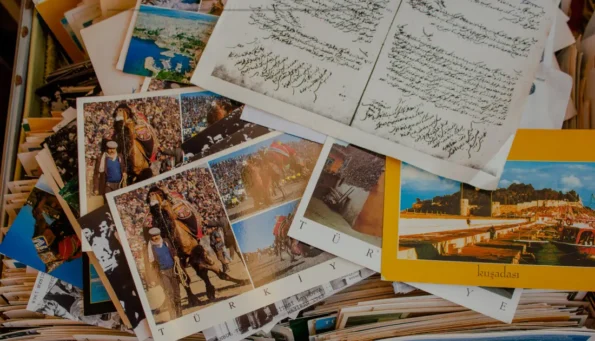
Step 1: Picking out your Postcard
Before you actually write your Postcard, you’ll need to pick one out. Postcards can be found at the post office and in many books or card stores like Hallmark or Indigo. If you’re visiting Canada from elsewhere, you can also find a postcard at almost any tourist shop.
There’s a vast library of postcards to choose from no matter where you go, so pick one that speaks to your soul. Your Postcard can represent where you are, how you feel, or how you feel about the recipient.
If you prefer, you can also make your own postcards with the help of online software and technology.
Step 2: Writing your Postcard
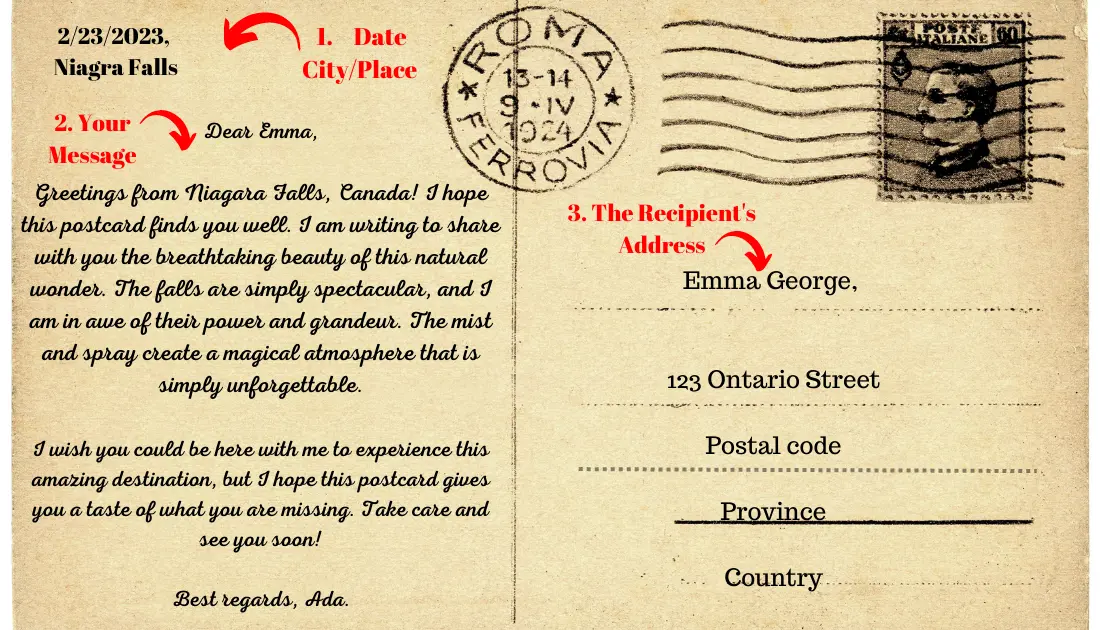
Once you’ve chosen your Postcard, now it’s time to write it. You’ll most likely need to write on the back left-hand side of your Postcard, but there’s not any “right” way to compose a postcard. You can write anything you want.
If you’re traveling, you might want to talk about the different places you’ve been to or give curious facts about your travel destination. You could also write about exciting news, things going on in your life, or even draw a picture or write a poem! The sky is the limit when it comes to writing – write whatever your heart desires.
Step 3: Filling out the address
On the back of your Postcard, you’ll have two sections. The left-hand section will be where you write your message. On the right-hand side is where you will put the address and recipient information.
Here is where you will put the recipient’s first and last name, address, area code, state, and country. Be careful not to write this information on the front of the Postcard, as the post office will not check here for the address.
Step 4: The stamp
Your stamp will go on the top right-hand of your Postcard, above where you placed the recipient’s mailing information. Stamps can be purchased at the post office from any country. You’ll only need one to send your card.

Step 5: Sender information
Finally, you’ll want to fill out the sender information (your information). You can put this above your message on the top left-hand side of the back of your card. Include the return address, name of sender, date, and the city or place it is being sent from. You don’t have to include a return address, but if you are worried about the Postcard getting lost, it’s always a good idea.
And that’s it – now you’re ready to send your Postcard. Head to your local post office and send it off! Remember though; postcards aren’t generally sent in envelopes, so you don’t want to include any personal or private information on the card. The postcard should be a fun, upbeat, and exciting way to say hello!